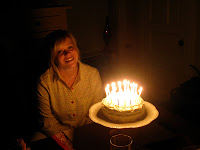
Last weekend, 2 of my best friends (Donielle and Laura) came to Chicago despite the cold and snow to see me! Not only did I get the privilege of hanging out with them, but I also got the privilege of hanging out with Doni on her special day...her birthday! Because I knew Doni had sacrificed hanging out with anyone else on her day so she could hang out with me, I wanted to make it extra special...so I made one of these! It was fun to make and it something that I know I will enjoy getting out and hanging for all the birthday festivities of family and friends. Interested in making one? It's super cheap, super easy and super fun....here's how:
You will need: *paper letters *scrapbook paper *poster board *rubber cement *Mod Podge *ribbon *scissors *sponge brush *ruler
1. I went to Shabby Princess and downloaded the letters.
2. I went to Microsoft Word and imported each letter. They were really big (took up the entire page) when I imported them, but I kept them that large (will explain later).
3. After I had imported all 13 letters, I had 13 pages according to Microsoft Word.
4. Before I printed I went to File-->Print-->Layout-->and changed the pages per sheet from 1 to 4. This way when I printed 4 letter came out to a page making it a total of 4 pages total.
5. I cut out each individual letter.
6. I went to Hobby Lobby (my drug of choice) and picked out different scrapbook paper that I loved. In this case I decided to go with the theme of Polka Dots and do a variety of colors - who doesn't love the rainbow?!
7. I cut my scrapbook paper to my desired size (enough to border the cut out letter when I glued them on there)
8. I then rubber cemented each piece of scrapbook paper to poster board. Once this dried, I cut the poster board out (this ensured the durability of each piece).
9. I rubber cemented each letter to each piece, eyeballing it to go in the middle.
10. I took Mod Podge and covered each letter (again, to ensure the durability of the sign).
11. I used a pair of scissors and "drilled" a hole (1 in each side) of the letters so that I could knot some ribbon in there.
12. I eyeballed the length of ribbon needed for in between each letter.
13. I hung it up and had birthday festivities with it! :)
***I think this can go without being said but this could work for anything - you could make a Christmas or Thanksgiving "banner" to rehang year after year.
I also was DYING to try something else out so I did it! I made a rainbow cake! Who better to make a rainbow cake for than my best friend Donielle who is like a rainbow, SO FULL OF COLOR!
Here is where I got the idea and you can find the step by step instructions there, but I will provide them for you here so you don't have to go there unless you're interested in the Weight Watchers version of it. This was NOT an original idea, although it was SUPER fun to do!
So here is what you need:
*1 box of white cake mix
*all the ingredients for your cake mix (follow the box)
*food coloring (I just bought the regular, run of the mill coloring from the grocery store).
*icing
*6 small bowls (you'll have 6 different colors of batter)
First, you simply mix your cake as if you were making an average, everyday cake...
You then get out your 6 different bowls and divvy up your batter as equal as possible...
You then use your food coloring to color each individual batter bowl it's assigned color - I did red, orange, yellow, green, blue, and purple. They sell food coloring in neon colors so you could do a neon rainbow if you wish. I just followed the back of the food coloring box to try to get the shade I was going for...
 You then take your 2 well greased circular cake pans (I used 8" pans) and you pour your batter in. In the 1st pan I poured half of each color in going in the order of the rainbow: 1/2 of the red batter, 1/2 of the orange, then yellow, then green, then blue and then purple. In the 2nd pan I poured the rest of the batter only I went in the opposite color direction starting with purple, then blue, green, yellow, orange and then red...
 I continued to bake them as normal, using a toothpick to double check before I removed them and let them completely cool...
Lastly, after they had cooled completely, I leveled off 1 of them and stacked them as normal and then iced them with Doni's favorite icing (appropriately: Rainbow Chip), making her think that I had made her normal Fun-Fetti birthday cake as she gets every year...
I then waited to surprise her with her colorful cake....


....taste the rainbow!
I've linked up to: Keeping it Simple; It's So Very Cheri; Sumo's Sweet Stuff; The Girl Creative; Making the World Cuter; Between Naps on the Porch; Bird Crafts; Persimmon Perch; Tools are for Women Too; Under the Table and Dreaming; The DIY Showoff; Domestically Speaking; C.R.A.F.T.; Hope Studios; All Thingz Related; Tip Junkie; Sugar Bee; Lucky Star Lane; Today's Creative Blog; My Delicious Ambiguity; The Gypsys Corner; New Nostalgia; Dirty Hands, Beautiful Life; Seven-Thirty-Three; Me and My Bucket; The Trendy Treehouse; My Backyard Eden; Blue Cricket Design; Someday Crafts; The Thrifty Home; Bobbypins Boardwalk; Sew Much Ado; Santa's Gift Shoppe; Somewhat Simple; Life as Lori; The Shabby Chic Cottage; House of Hepworths; The Train to Crazy; Fireflies and Jellybeans; The Shabby Nest; It's a Hodgepodge Life; Someday Crafts; Fun to Craft; A Few of My Favorite Things; Home is Where My Story Begins; Tidy Mom; Chic on a Shoestring Decorating; Decor Mama; Fingerprints on the Fridge; Kojo Designs; Tatertots and Jello; Funky Junk Interiors; Along for the Ride; Under the Table and Dreaming; I Heart Naptime with Chocolate Sundaes
I've linked up to: Keeping it Simple; It's So Very Cheri; Sumo's Sweet Stuff; The Girl Creative; Making the World Cuter; Between Naps on the Porch; Bird Crafts; Persimmon Perch; Tools are for Women Too; Under the Table and Dreaming; The DIY Showoff; Domestically Speaking; C.R.A.F.T.; Hope Studios; All Thingz Related; Tip Junkie; Sugar Bee; Lucky Star Lane; Today's Creative Blog; My Delicious Ambiguity; The Gypsys Corner; New Nostalgia; Dirty Hands, Beautiful Life; Seven-Thirty-Three; Me and My Bucket; The Trendy Treehouse; My Backyard Eden; Blue Cricket Design; Someday Crafts; The Thrifty Home; Bobbypins Boardwalk; Sew Much Ado; Santa's Gift Shoppe; Somewhat Simple; Life as Lori; The Shabby Chic Cottage; House of Hepworths; The Train to Crazy; Fireflies and Jellybeans; The Shabby Nest; It's a Hodgepodge Life; Someday Crafts; Fun to Craft; A Few of My Favorite Things; Home is Where My Story Begins; Tidy Mom; Chic on a Shoestring Decorating; Decor Mama; Fingerprints on the Fridge; Kojo Designs; Tatertots and Jello; Funky Junk Interiors; Along for the Ride; Under the Table and Dreaming; I Heart Naptime with Chocolate Sundaes


kari! how fun! i want to come see you! :)
ReplyDeleteWhat a fun cake made with love!! Looks YUMMY : )
ReplyDeleteHow fun!!! I LOVE the cake!
ReplyDeleteLOVE THE CAKE!! What a great idea!!
ReplyDeleteOh wow!! That cake is amazing! Lucky friend!! :)
ReplyDeleteCool cake! I've only done rainbow cakes as layers ~ this is a fun idea!
ReplyDeleteWOW, Kari!!
ReplyDeleteThis is fun!! I once thought of doing this but chickened out hehe maybe now I'll get off my behind and have a go, 'cause it sure looks impressive! :)
Thanks for linking up to Bird Crafts!
Love,
Bird
Adorable banner and gorgeous cake! I love all the colors!! Super fun! Thanks so much for joining the Sunday Showcase Party! I greatly appreciate it. Hope you are having a wonderful week! ~ Stephanie Lynn
ReplyDeleteWOW -- My kind of party. So colorful and fun with lots of smiles. Your friends are pretty lucky. I think you've very clever on both the banner and the cake. To be honest --- I REALLY LOVE THE CAKE!!! Thank you for linking this cute and delicious "bragable" to the Boardwalk Bragfest.
ReplyDeleteMy sister makes rainbow cakes. They look so cool!
ReplyDeleteThanks for linking up with Sugar & Spice.
I love the banner!It looks great! I will be using it for inspiration next week for my daughter's 18th birthday/graduation party!
ReplyDeleteThat is a darling banner! And I have seen the rainbow cake before and have always wanted to make one but haven't yet. Yours looks delicious!
ReplyDeleteHannah
Cute banner...and this cake just screams "FUN"! Thanks for inviting us to your party and joining ours on Modern Craftswoman Monday! Rory
ReplyDeleteLove the banner and the cake! So cute!!
ReplyDeleteOh gosh.. look at all this fun colour! That cake is amazing by the way. It makes me smile. And hungry!
ReplyDeleteDonna
What adorable ways to celebrate your friends. The cake looks awesome. I love that you matched your bowls to the batter. Fiesta ware? I love it!
ReplyDeleteThanks for sharing with us at Saturday is Crafty Day!
Laura @ along for the ride
Thanks for sharing! Looks like fun.
ReplyDeleteBecca
Very pretty banner and I love the look of that cake. Thanks for the tut.
ReplyDeleteHope you can visit me sometimes over at Pittypat Paperie.
Thanks so much for joining The Sunday Showcase. I greatly appreciate it! Hope you have a wonderul week! ~ Stephanie Lynn
ReplyDeleteThanks for linking up to Tot Tuesdays! I hope you’ll join me again next week for another fantastic party! Have a great week!
ReplyDelete