Showing posts with label Decorating. Show all posts

Tuesday, December 10, 2013

DIY: Advent Calendar

It all started when I was perusing Pinterest and I saw tons of different versions of felt Advent calendars and they instantly took me back to my childhood.  When I was growing up, we had a felt calendar that my mom had bought at the church Christmas sale.  I loved that calendar!
It looked a little something like this (found here) 

I remember looking forward to pulling out the stuffed animal to add to the tree and to read the verse of the day.  This helped build anticipation for my child self, and it also helped me understand that Christmas was so much more than Santa and presents.  I instantly starting pinning my little heart out and began searching and pinning for all sorts of Advent inspirations.  Here are some of the different calendars that inspired me:

                                            here                                                          here

here                                                         here    

While I love these different calendars, I knew mine needed to be a little bit different.  My first preference was size.  I didn't want a really big calendar because I knew I didn't have a good place to put it - it needed to be reasonably sized.  My other preference was simple, similar to the first calendar, only I didn't want to use clay tags, I wanted to use patterned paper ones.  With all these thoughts swimming in my head, I headed to Hobby Lobby (along with the rest of the the Western world searching for the "just right" Christmas supply/gift/decoration).  Here is what I ended up with:

I picked up the mini clothes pins (the only thing that wasn't on sale) for $2.99, the 8x10 picture frame (50% off) for $7 and then 6 Christmas colored scrapbook paper and 1 piece of burlap-looking paper (all were 50% off as well).  I'm pretty sure this entire project cost somewhere around $12.  What is not shown above that I did use was jute twine (already had it) and white cardstock (already had it).  

Originally I was going to just purchase the tags at Hobby Lobby and cover them with the patterned paper, only they weren't small enough to fit on an 8x10 picture frame. That's when I decided to bust out my Silhouette and cut my own tags.  If you don't own a cutting device, while tedious, you could hand cut your own tags if you need them smaller than the ones available at the store. 

My next step was to cut out a bunch of different tags on the different papers so that I had options with my layout.  I then arranged the different tags (there were 3) and the different patterns (3) in a random assortment. 

Now that my layout and design was decided, I was ready to add the verses.  I used this pin to choose my verses.  I decided to add one for December 25th, and I added Romans 5:1 (There being justified by faith, we have peace with God through our Lord Jesus Christ). Once I knew the tag size order, I knew the verse that needed to correspond to the right shape to fit my design.  I got on my Silhouette and added the verses and cut them out on white cardstock and then glued them to the back of the patterned paper that it went with:


Then I decided to cut small circles out on white cardstock that had the numbers 1-25 on them to add to the front of my tags. Once I cut them out, I glued them on the front of all my tags so I knew which tag went with Dec. 1st, 2nd, 3rd, etc.


And then I was in business!  I was ready to finish assembling my calendar so that it was usable.  I decided to take the glass out of the frame and attach three strings of the jute twine.  I would use the twine to pin my tags to.  I figured out where I wanted the placement of my twine and marked it on the inside of the frame. I then hot glued it down.


Once the jute was in place, I was ready to put the rest of the frame together. I took the burlap paper and put it in the frame in back of the jute. Then I put the back on the frame and started adding my tags to the twine using the small pins that I had bought.  As it was coming together, I was getting more and more excited...I loved the way it was looking!


And once all the tags were in their place, I was in love!


I couldn't love it more! I love how it looks, I love it's size, and I love how functional it is!  I know that this will be a well-loved and used Christmas decoration for many years to come!  I still love the felt calendar, and look forward to one day when my life requires one - but this year ain't the year for that! 
:-)

***I also found on Pinterest this great resource: a free download of "Good News Great Joy - Daily Readings for Advent" from John Piper Ministries. If you haven't already, check it out!

What about you?  Do you have an Advent Calendar that your family uses every year?  What kind is yours?

I'm linking up to: 


Thursday, February 28, 2013

A Bright Transformation

After 3 and a half years of not seeing eye-to-eye, Stephen and I finally caught up on the same page and made a big, unimportant purchase: we bought a new TV.  To some of you, this is no big deal....however, to me, this was HUGE!  That story, however, is for another day and another time...continuing on...
The reason I tell you about the new TV is because it called for a new place to set it up.  Our old TV used to sit to the right of our fireplace:


Here's the problem with this set-up: it was definitely NOT conducive to watching television while sitting on the couch.  Something had to give, especially now that we have a new television.  Some of you may be thinking, "Hang that television above the mantel!" but I just couldn't bring myself to do it...I really love being able to decorate the mantel during the different seasons, and after this summer, when I used a Pinterest inspiration to update the mantel, I really didn't want to mount a television in that decoration space.  Originally, I thought we could put the new TV to the left of the fireplace, but then Stephen pointed out that it would cover up a lot of our bookshelves...that's when the brainstorming occurred.  

After seeing a friend turn a dresser into a TV stand, and then seeing them all over Pinterest, I decided that I was now on the lookout for a dresser to transform myself (with the help of my dad and his tools, that is).  I didn't need just any dresser, I needed a small enough dresser to put in the nook to next to our french doors (where the chair is):


This nook is directly across from the sofa and provides a wonderful viewing area to watch the television from both the couch and the love seat.  And so the dresser hunt began.  I literally checked Craigslist daily for about 4 months before I hit, what I believed, to be the jackpot.  I picked up this little lady, who just happened to be the exact right size (40") and came with a mirror (which was repurposed for another area of our home - that's to come later) for $50.  Here she is:


My original plan was to only remove the top drawer to use as a shelf for cable/dvd player and utilize the bottom two.  The only problem with this plan, was that when I got home, the drawers turned out to not be in as good of shape as I had previously thought...not to mention the whole thing was looking a little sad as I removed drawers:


Once I realized the condition of the drawers, I decided to only use the bottom drawer and to improvise with baskets where the second drawer originally was.  Here was the plan: remove the warped cardboard that separated each drawer and replace it where the first and second drawer had been with thick MDF that could act as a shelf.  I would then prime and paint the piece and call it a day...unfortunately it took a little bit longer than I had hoped, but nonetheless, the project is complete and I couldn't be happier!


I went to Home Depot and had 3/4" MDF cut to match the length and width of the bottom where the first and second drawers originally sat.  My dad helped me cut the small corners on these boards so that they fit perfectly inside the dresser.  He also helped me by attaching side supports on each side of the inside of the dresser so that the MDF had something to sit on all the way around it.  In order to get the boards in, we had to take the back and the top off the dresser - she looked a bit decapitated for awhile!  I filled in the hardware holes on the bottom drawer, because I only needed 2 holes (instead of the 4) for the new pulls.  
I followed Centsational Girl's advice and went with the Zinsser oil-base cover stain/primer, because the top of the dresser was a laminate.  I bought a cheap paint brush for the primer and then tossed it when I was finished to avoid the messy clean up.  I primed the pants off the dresser, and the new shelves, painted them and then put the drawers into place.  I put the bottom shelf into place and polyurethaned it before I put down the top shelf.  Once both the shelves had been polyed, I reattached the top and the front decorative pieces and then polyurethaned the entire dresser.  I decided to paint it "Yukon Gold" by Olympic to match my Ikea Hemnes Linen Cabinet (in case they ever ended up in the same room). 1 quart of paint was more than enough.
My dad then cut 4 holes into the back for cords to go through. The bottom drawer had to be reinforced and fixed, as it was falling apart.  My dad cut a thin piece of flat wood and added it to the bottom, inside of the drawer.  He also reinforced the sides and back by attaching thin pieces of wood with nails to the inside of the drawer.  Lastly, he put L-shaped brackets on either side of the drawers to hold it together.  You'd never know the drawer was in bad condition, unless you pulled it all the way out! 
The pulls I got at Home Depot for a couple bucks each, and the baskets are the perfect size and were purchased at Lowes.  When it's all said and done, I believe we spent a little more than $100 on this new TV stand and it fits and looks perfect in its new home:


Isn't she a beaut?!


Friday, November 23, 2012

Mantel Make-Over

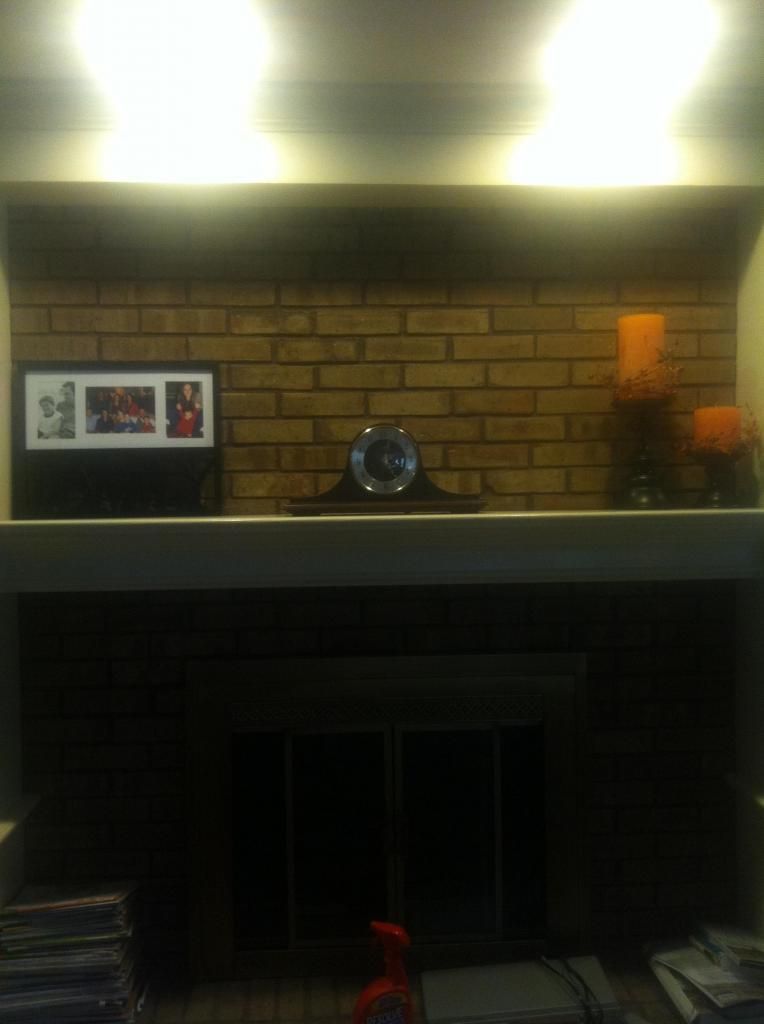
I knew my mantel was a snoozer....


Mantle

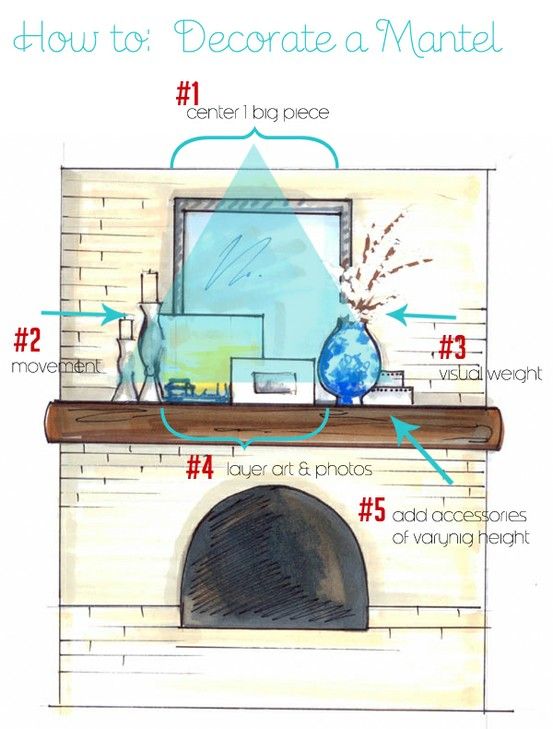
But I just didn't know what to do about it.  Until I saw this on Pinterest...

Photobucket

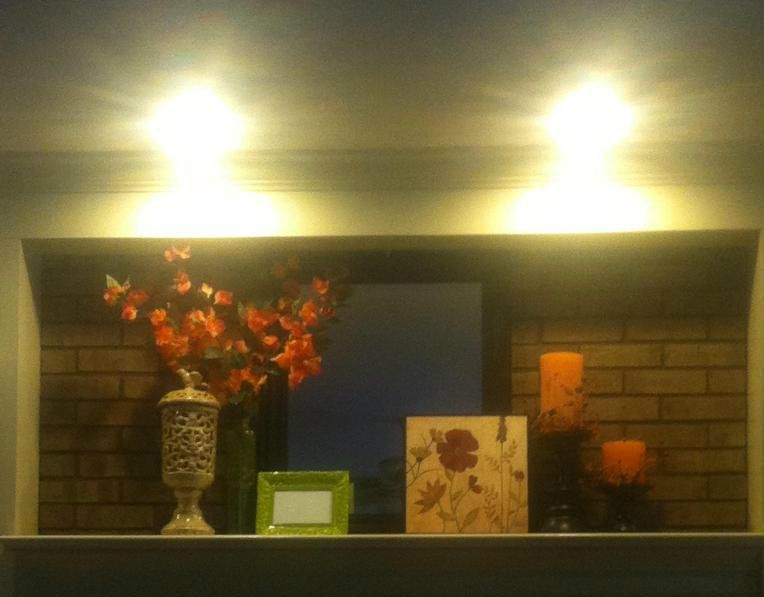
I had some store credit at Home Goods and so I went there and found most of what I needed for a great price.  I purchased a mirror and some knick-knacks and I got this:

photo-70
The mirror, ivory decorative piece and picture frame (once white, now green) are from Home Goods, the flower picture on the front, right is from JoAnns and the green vase in the back, left is from Wal-Mart.  The flowers in the vase are from Pier One (gift card baby!).  I think in total, I spent about $20 of my own money on this makeover and I couldn't be happier!


photo-71
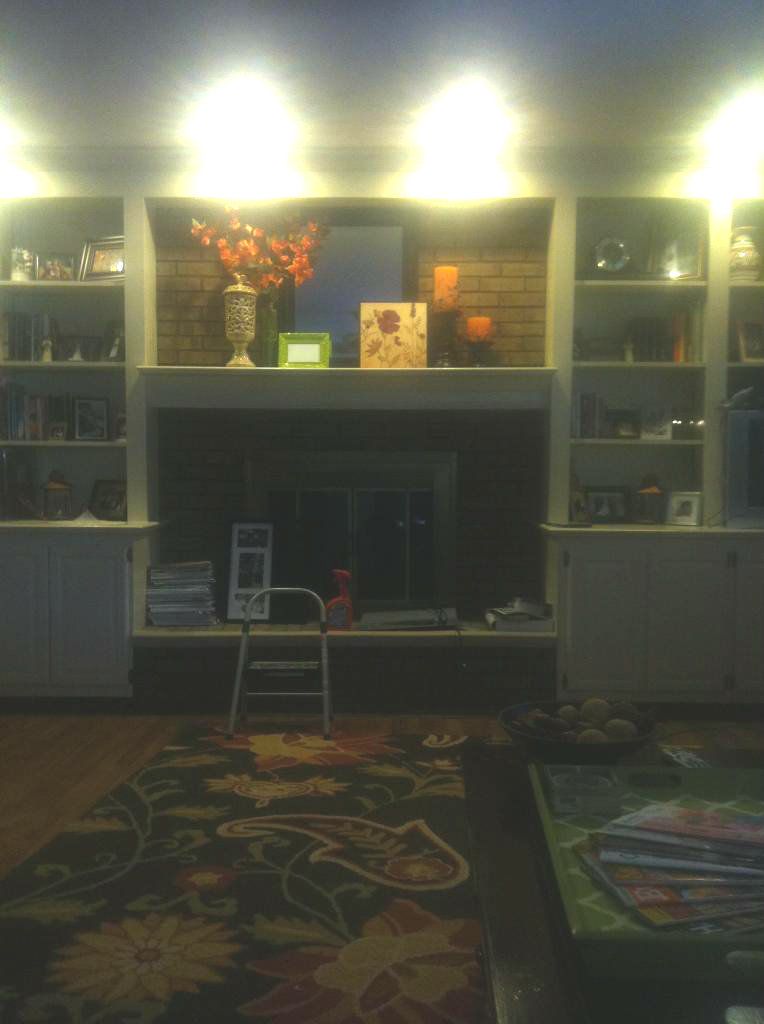
Here is the full thing (don't mind the step ladder and resolve...).

Thanks, Pinterest!  Have you redecorated a space of yours using Pinterest as inspiration?  How'd it go???  I'd love to see it!


Saturday, November 17, 2012

Dining Room Help!

Hi, my name is Kari, and I'm a fall-aholic.  As a result my house is busting at the seems with shades of oranges, yellows, reds, greens and browns.  Ever since our Chicago days, I've been trying to find a way to incorporate some cool hues into the mix of all things autumn.  A few weeks ago, while perusing Overstock.com, I found a rug that I really love and would like to incorporate it into our dining room.  

Our Dining Room (we are going to pull up the carpet and put down hardwood)

"The" Rug :)

I'm so pumped about this rug because it does exactly what I've been trying to do for these past couple of years: bring in some shades of blue. 
Now, here's where I need your opinion.  My mom and dad got new dining room furniture last year and graciously gave Stephen and I their old set.  We inherited a table, 6 chairs, a buffet, and a china cabinet from them.  Since they gave it to us, all but the table and chairs have been stacked up in our garage.  You see, the problem is is that I'm not feeling the current state of the furniture.  It needs some help...
The buffet and the bottom of the china cabinet, stacked on top of one another.

This past summer, Family Handyman magazine had an article on how to refinish furniture like a pro (specifically on how to stain your pieces darker).  After reading the article, I felt empowered and just knew that I wanted to darken the current stain and give the pieces more of a walnut look.  But then, I would see pictures of different two-toned furniture and I would fall in love with the way it looked...

(photo from here)

My Chicago friend posted on instagram a beautiful buffet that her friend found at the Salvation Army and refinished it by painting the bottom of it a grey and staining the top of it a dark stain.  I immediately fell in love with it was won over by this two toned look.  My new idea is to paint the bottom of my table and buffet a heathered blue to go with the blue in the rug, and then stain the tops of both pieces a dark, walnut stain.  Buuuuuuuuuuttttttt, there's a catch....
If I do try to accomplish the two-toned look, what can I do with my china cabinet to keep it from looking like a stuck out sore thumb?  Do I paint the whole thing or stain the whole thing?  Here's where you come in....
(photo from here)
What do you think of this two-toned china cabinet?  What if I painted the bottom the same heathered blue as I want to paint the rest of my furniture, and stain (just like in the picture above) a darker stain to match the top of my table and buffet?

If you have an opinion, I would love to hear it, as I don't know what I should do to refinish my furniture.  Should I stain it a darker stain and just keep things moving?  Should I do a two-toned finish using the clue from the rug on the bottom?  If I do that, what should I do with my china cabinet?  
Decisions, decisions!  What's a girl to do?! :)  Leave a comment and give me your opinion - I would love to hear it!


Monday, July 2, 2012

Bathroom Re-Do


You know the drill: you buy a house and you instantly inherit the style/design of the previous owners until you get the chance to make your house your house.  This was exactly the case with my half-bath/powder room on the first floor of our house.  The problem with this room is that nothing about it is what I would choose to put in my half-bath...nothing.  When we first looked at the house, I had already started thinking about what I could do to this room to update it and make it more of my own. Before I start breaking down my thoughts, let me share with you the actual room:
 
 Personal Problem #1 with this room: it's wallpapered.  Now, obviously these ferns are somewhat "in" right now (see PB and their fern towels) however, they're just NOT for me.  Unfortunately, Stephen says he likes these ferns...that caused a lot of need for discussion/begging/reasoning :-)

Personal Problem #2 with this room: the cabinet that eats up a ton of this tiny room and the 1980s faucet that adorns this vanity.  Both must go.  


Personal Problem #3 with this room: the ceiling is painted green.  Ugh. Thanks!  I'm not saying that you shouldn't paint your ceiling - I realize that a lot of designers will tell you that this is a great way to add color or points of interest to your room.  My problem with it is that this room is just so small - I'd prefer a white ceiling (again, personal preference).

Personal Problem #4 with this room: I do not like the chandelier in this bathroom.  Maybe it's the wrong design to go with light, maybe it's the fact that it's in the bathroom - I'm not quite sure what it is, but I'm just not feeling the chandelier.  Perhaps if it were in a different room with different design around it I could like the chandelier, but not in this context. 

Now let me introduce you to the new look I'm shooting for in this room:
I am giddy with excitement at the possibility that this room holds!  So excited that I went on ahead and got a little big for my britches...


I got the itch to remove the ferns and they came down super easily - almost too easily!  I'm fairly certain there's no going back now!

Any of you seasoned DIYers out there that have already updated a bathroom in your house and would like to share some good tips for a newbie like myself?  I'd love to hear your advice!


Sunday, January 22, 2012

Christmas Ornaments 2011

Yeah, I know, it's January 22...I get it, Christmas is over.  My tree is still up in my family room (pathetic, I know), which I believe constitutes me being able to share with you our Christmas ornaments that adorned our tree this year :).  You can check out our 2010 ornaments here.
Introducing our 2011 Christmas tree!  
I'm all for pretty, color coordinated trees that look elegant and really bright up a room, but I'm even more for a tree that has fun, multicolored lights adorning it and filled with ornaments that hold special memories from loved ones or fun occasions.  Maybe one day, when I can convince Stephen that it's not frivolous, I can have both types of trees - until then, the one multicolored light tree is what we'll have!  Here are our special, 2011 ornaments that called our tree "home" for the first time this year:


In March, Stephen and I had a wonderful trip visiting friends and hitting the slopes in Salt Lake City, Utah.  The awesome ornament on the left is made out of salt from the great Salt Lake, and the ornament on the right is in honor of Stephen trying out his hand at Snowboarding and not dying - way to go Stephen! 

This ornament made it's way back from Alaska this year from when my mom and dad ventured there in July and August of this year.  It also reminds us of our great trip there back in 2010.  

 I picked up this great ornament to help me remember a FANTASTIC trip that I took to New York City last December with the besties and Steph-O.  I searched the city high and low for a more authentic New York ornament, only to be stuck buying this sucker at an ornament tent in Central Park...oh well, it does its job!
 Last Christmas I decided that I was going to make Salt Dough Ornaments to act as Gift Tags for friends and family.  This little guy was from my salt dough batch last Christmas. 

 Stephen and I have a Chicago ornament from our first two years of living in Chicago.  This Christmas marked our first year not in our beloved city, but I couldn't bring myself not to get a new Chicago ornament.  When we ventured back "home" in November, I made sure to pick one of these 'beauts up at Holiday Lane in Macys.  

"Santa" brought me this awesome UK ornament in my stocking last Christmas.  Evidently, I have an obsession with Christmas trees and hope to have ANOTHER tree one day in our basement that is adorned with all our sports themed ornaments.

"Santa" brought Stephen this IU ornament last year in his stocking.  The Troy Polamalu ornament was a gift to him from our sister-in-law in honor of his love for Troy.  These ornament would also find it's way onto our future said sports-themed tree that could potentially end up in my basement one day :).

Two years ago I picked up this ornament for my sister and brother-in-law in honor of their first year in their new house.  Since then, I couldn't wait to get my grubs on it!  As soon as I could I had one made for us in honor of our new home.  It has our new address written on the bottom of it.

Just like we picked up a Chicago ornament every Christmas we lived in Chicago, I thought it would be fun to do the same here in Louisville.  This year, I found this fun Flur de Leis at a local store and thought it was perfect to represent our first Christmas back in Kentucky!

So that's it, those are the ornaments that made their way on our tree this year...I know what you're thinking, it's time to go and take that tree down!  I think my tree would agree with you.  In fact, I believe that it's begun to protest that it is still working overtime at the end of January.  So much though, that about 1/3 of our lights have gone out on our tree leaving it to look even more pathetic than a regular tree would look still standing in January.  Here's a peek at our sad, sad tree:
What about you?  When did you get around to taking your tree down?  Anybody still rocking their tree like I am in the end of January?  Come on, speak up!  I know there's someone out there that's still in the same boat as myself!!!