It looked a little something like this (found here)
While I love these different calendars, I knew mine needed to be a little bit different. My first preference was size. I didn't want a really big calendar because I knew I didn't have a good place to put it - it needed to be reasonably sized. My other preference was simple, similar to the first calendar, only I didn't want to use clay tags, I wanted to use patterned paper ones. With all these thoughts swimming in my head, I headed to Hobby Lobby (along with the rest of the the Western world searching for the "just right" Christmas supply/gift/decoration). Here is what I ended up with:
I picked up the mini clothes pins (the only thing that wasn't on sale) for $2.99, the 8x10 picture frame (50% off) for $7 and then 6 Christmas colored scrapbook paper and 1 piece of burlap-looking paper (all were 50% off as well). I'm pretty sure this entire project cost somewhere around $12. What is not shown above that I did use was jute twine (already had it) and white cardstock (already had it).
Originally I was going to just purchase the tags at Hobby Lobby and cover them with the patterned paper, only they weren't small enough to fit on an 8x10 picture frame. That's when I decided to bust out my Silhouette and cut my own tags. If you don't own a cutting device, while tedious, you could hand cut your own tags if you need them smaller than the ones available at the store.
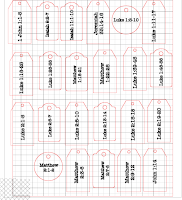
My next step was to cut out a bunch of different tags on the different papers so that I had options with my layout. I then arranged the different tags (there were 3) and the different patterns (3) in a random assortment.
Now that my layout and design was decided, I was ready to add the verses. I used this pin to choose my verses. I decided to add one for December 25th, and I added Romans 5:1 (There being justified by faith, we have peace with God through our Lord Jesus Christ). Once I knew the tag size order, I knew the verse that needed to correspond to the right shape to fit my design. I got on my Silhouette and added the verses and cut them out on white cardstock and then glued them to the back of the patterned paper that it went with:
And then I was in business! I was ready to finish assembling my calendar so that it was usable. I decided to take the glass out of the frame and attach three strings of the jute twine. I would use the twine to pin my tags to. I figured out where I wanted the placement of my twine and marked it on the inside of the frame. I then hot glued it down.
Once the jute was in place, I was ready to put the rest of the frame together. I took the burlap paper and put it in the frame in back of the jute. Then I put the back on the frame and started adding my tags to the twine using the small pins that I had bought. As it was coming together, I was getting more and more excited...I loved the way it was looking!
And once all the tags were in their place, I was in love!
I couldn't love it more! I love how it looks, I love it's size, and I love how functional it is! I know that this will be a well-loved and used Christmas decoration for many years to come! I still love the felt calendar, and look forward to one day when my life requires one - but this year ain't the year for that!
:-)
***I also found on Pinterest this great resource: a free download of "Good News Great Joy - Daily Readings for Advent" from John Piper Ministries. If you haven't already, check it out!
What about you? Do you have an Advent Calendar that your family uses every year? What kind is yours?
I'm linking up to:
Carolyn's Homework; Funky Polka Dot Giraffe; Titus 2 Tuesday; The Blackberry Vine; Hope Studios; New Nostalgia; Coastal Charm


No comments:
Post a Comment
I love to hear your thoughts - leave me some loving!