Friday, November 23, 2012

Mantel Make-Over

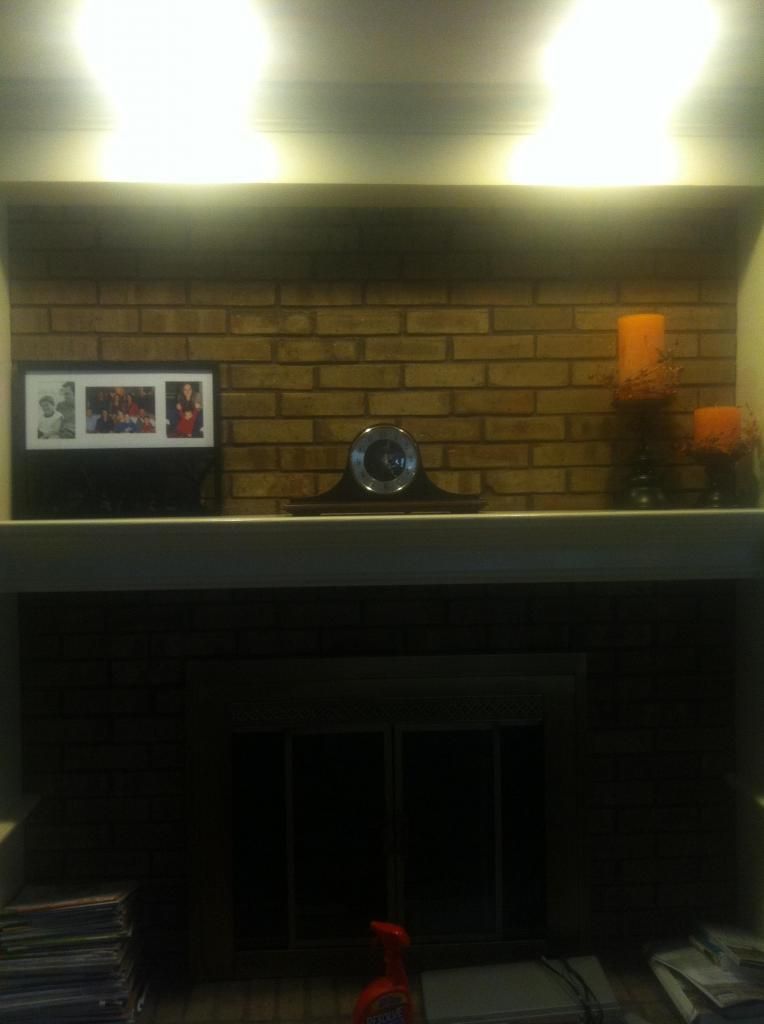
I knew my mantel was a snoozer....


Mantle

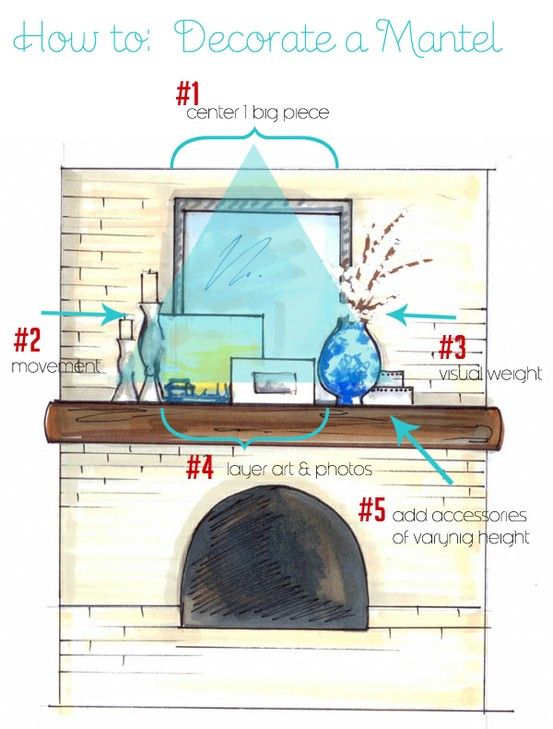
But I just didn't know what to do about it.  Until I saw this on Pinterest...

Photobucket

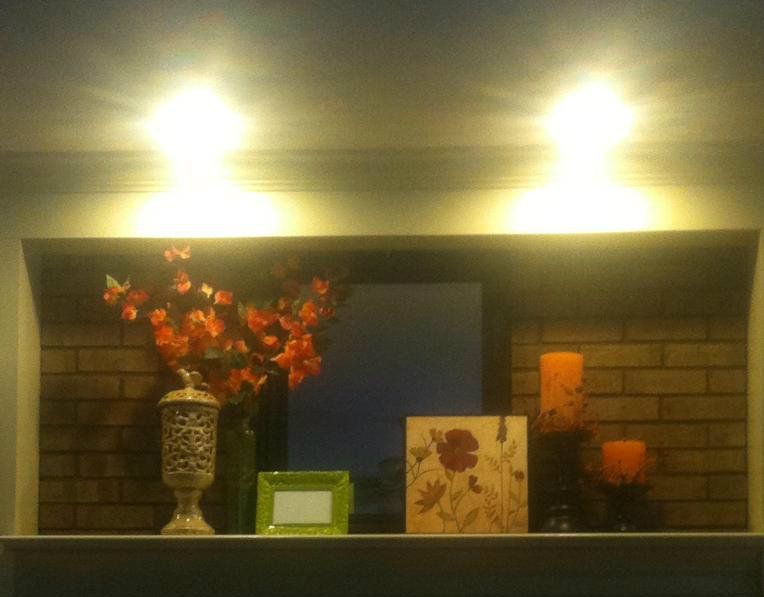
I had some store credit at Home Goods and so I went there and found most of what I needed for a great price.  I purchased a mirror and some knick-knacks and I got this:

photo-70
The mirror, ivory decorative piece and picture frame (once white, now green) are from Home Goods, the flower picture on the front, right is from JoAnns and the green vase in the back, left is from Wal-Mart.  The flowers in the vase are from Pier One (gift card baby!).  I think in total, I spent about $20 of my own money on this makeover and I couldn't be happier!


photo-71
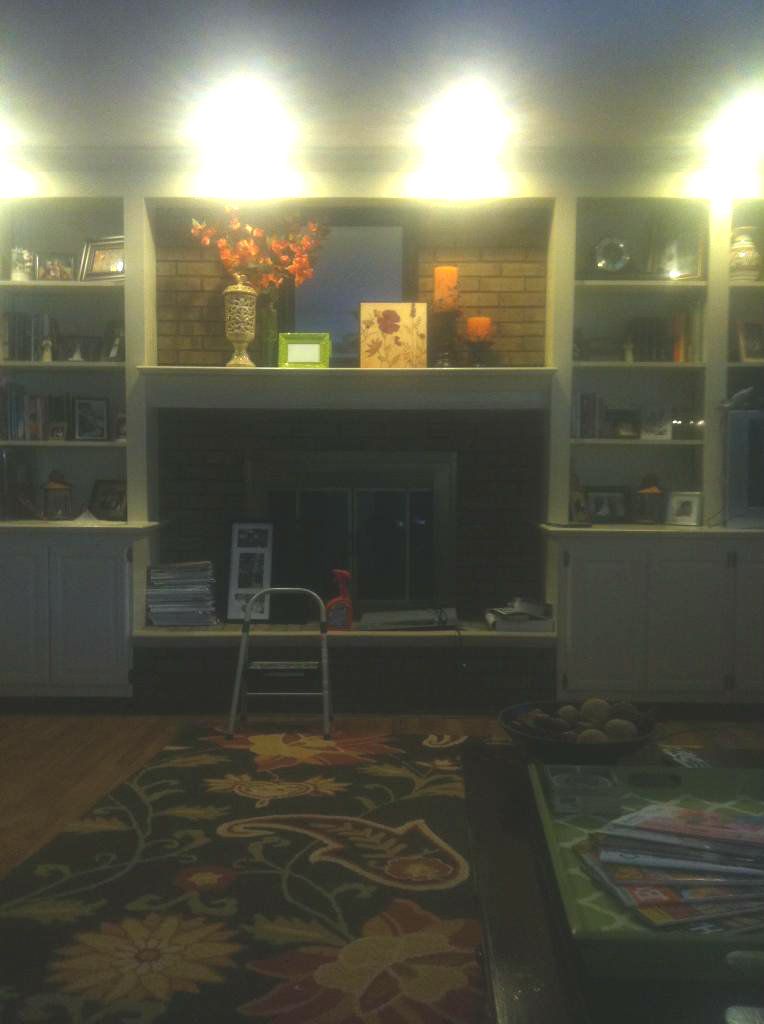
Here is the full thing (don't mind the step ladder and resolve...).

Thanks, Pinterest!  Have you redecorated a space of yours using Pinterest as inspiration?  How'd it go???  I'd love to see it!


Sunday, November 18, 2012

The Winner of Tiny Prints $50 Giveaway is....

Ashley!  She said:

How cool!  I like Be Shiny :)

Ashley S.


Ashley was the 1st one to comment and Random.org decided that she should be the winner :)

Thank you to everyone who participated!  I hope you enjoy your Holiday cards from TinyPrints, Ashley!

Saturday, November 17, 2012

Dining Room Help!

Hi, my name is Kari, and I'm a fall-aholic.  As a result my house is busting at the seems with shades of oranges, yellows, reds, greens and browns.  Ever since our Chicago days, I've been trying to find a way to incorporate some cool hues into the mix of all things autumn.  A few weeks ago, while perusing Overstock.com, I found a rug that I really love and would like to incorporate it into our dining room.  

Our Dining Room (we are going to pull up the carpet and put down hardwood)

"The" Rug :)

I'm so pumped about this rug because it does exactly what I've been trying to do for these past couple of years: bring in some shades of blue. 
Now, here's where I need your opinion.  My mom and dad got new dining room furniture last year and graciously gave Stephen and I their old set.  We inherited a table, 6 chairs, a buffet, and a china cabinet from them.  Since they gave it to us, all but the table and chairs have been stacked up in our garage.  You see, the problem is is that I'm not feeling the current state of the furniture.  It needs some help...
The buffet and the bottom of the china cabinet, stacked on top of one another.

This past summer, Family Handyman magazine had an article on how to refinish furniture like a pro (specifically on how to stain your pieces darker).  After reading the article, I felt empowered and just knew that I wanted to darken the current stain and give the pieces more of a walnut look.  But then, I would see pictures of different two-toned furniture and I would fall in love with the way it looked...

(photo from here)

My Chicago friend posted on instagram a beautiful buffet that her friend found at the Salvation Army and refinished it by painting the bottom of it a grey and staining the top of it a dark stain.  I immediately fell in love with it was won over by this two toned look.  My new idea is to paint the bottom of my table and buffet a heathered blue to go with the blue in the rug, and then stain the tops of both pieces a dark, walnut stain.  Buuuuuuuuuuttttttt, there's a catch....
If I do try to accomplish the two-toned look, what can I do with my china cabinet to keep it from looking like a stuck out sore thumb?  Do I paint the whole thing or stain the whole thing?  Here's where you come in....
(photo from here)
What do you think of this two-toned china cabinet?  What if I painted the bottom the same heathered blue as I want to paint the rest of my furniture, and stain (just like in the picture above) a darker stain to match the top of my table and buffet?

If you have an opinion, I would love to hear it, as I don't know what I should do to refinish my furniture.  Should I stain it a darker stain and just keep things moving?  Should I do a two-toned finish using the clue from the rug on the bottom?  If I do that, what should I do with my china cabinet?  
Decisions, decisions!  What's a girl to do?! :)  Leave a comment and give me your opinion - I would love to hear it!


Thursday, November 15, 2012

Tiny Prints' 2012 Holiday Collection and GIVEAWAY!

Let me first start out this post by letting you know how absurd it is in my mind that we're already halfway through the month of November...seriously - absurd!  With that being said, Christmas is right around the corner, which brings with it so many wonderful things!  One of my favorite things about Christmas is receiving cards from close friends and family.  As silly as it sounds, I love to have that connection with people I don't get to see everyday, especially when it involves a picture of their lovely faces!  Last year, Stephen and I ordered our Christmas cards from Tiny Prints and had a wonderful experience with them (you can read about it here).  The cards came quickly, they were made of quality paper and they looked exactly like what I saw on my computer screen when I placed my order.  I was so happy with my order as soon as it arrived.

With that being said, you can imagine how ecstatic I was when Tiny Prints contacted me and told me they would like to give me and one of my reader's money off of our Christmas Cards for this year!  Let me share with you some of my favorites (I happen to have a bajillion, but I'll spare you from looking at all of them!)

I love Peaceful Holly in sage - I really like the font and the simple image of the holly leaves.

Merry Plaid in dark grey - I tapped into my love of plaid last year, and this one happened to remind me of the newly found love from last year.

Drawn Blessings in rich red - I think I really have a thing for red and green together, especially this shad of green (remember the first card I shared with you???).  I also really like the font!

Mod Holly in evergreen - again, I'm loving the color combination, as well as the simplistic holly graphics.


Check out Tiny Prints special offers page to get a great deal on these beautiful cards!  On top of that, enter this giveaway to receive $50 off of your next Tiny Prints order (expires 12/14/2012 – no extensions, does not include shipping & cannot be combined with any other promos).  To enter, simply visit the Tiny Prints Christmas Cards page and leave me a comment letting me know which card is your favorite.  It's that simple!  

Make sure you enter in the giveaway today!  It will be closing on Sunday, November 18 at 12pm EST.

Disclosure: While this post is sponsored by Tiny Prints, all opinions are my own.  I will be ordering my Christmas Cards this year from Tiny Prints and am excited to see them!


Monday, November 12, 2012

A Weekend in Chicago


Do you remember when I told you about how Princeton was protesting the month of October?  If not, you can read about it here.  Well, November came in with a big bang and a trip to Chicago.  Princeton was not a happy camper...


The good news is that he had a good time visiting with Grandmama and Super Pops (my mom and dad) and when we returned, he hadn't destroyed anything else out of anger.  It was a win-win situation!

Stephen and I had been looking forward to our trip for the longest time, and were thankful for a reason to get away.  We had friends who were tying the knot in Chicago, and we couldn't wait to get there!
As soon as we drove into the city, we headed to one of our most favorite restaurants, Joy Yee.  Joy Yees is a pan Asian restaurant located in Chinatown (I wrote about it here when my sister and her husband visited).  For the past couple of months every time Stephen and I go out to eat, Stephen has shared his craving for Joy Yees.  Thankfully we were able to satisfy this craving on this trip.  It was a night of a double win, as our good friend, Shea, joined us on our Joy Yee extravaganza!  Unfortunately, we have no pictures to document this :-/

Joy Yee, we love you!


Stephen proudly showing us what he's going to order :)

Our meal: Coconut Curry Chicken and Chicken & Shrimp Pad Thai


Stephen double fisting our Bubble Tea choices.  Mine was on the left: a Mango Freeze.  Stephen's is on the right: a Berry Freeze.

On Saturday we enjoyed time with our good friends, Matt and Amy before heading off to Carnivale (a great Brazilian restaurant in downtown Chicago) to enjoy a wonderful wedding!

It's such a fun and beautiful atmosphere, with DELICIOUS food!

They served our table family style with food that was out of this world!  

 Stephen and I are blessed to have such good friends.  Here are our good friends, Debbie and Stephen - both were in our small groups in Chicago. 
The Bride and Groom

After the wedding, Stephen and I headed to our dear friends, Mike and Amanda's apartment (Princeton's previous owners) to hang out with them and our other dear friends, Matt and Amy.  We enjoyed a great night of food (more food?!) and Balderdash.  You can never go wrong with Balderdash and this crowd!  We laughed until we cried!

On Sunday, we were privileged to worship at The Moody Church before we spent the rest of the day hanging out with friends and loving our home away from home even more. 

We even got a chance to drive past our old apartment...

 We love Chicago and miss it daily.  The people make the place, and God definitely blessed us with an amazing Chicago Family that we'll have for the rest of our lives. 

Have you ever been to this great city?  If so, what's your favorite thing to do there?


Thursday, November 1, 2012

Crayon Wreath

The teacher inside of me was screaming to try this when I first saw the idea pinned on Pinterest:
My only problem with it was there was no tutorial.  No worries for this gal, I just decided to make my own up.  If you'd like to make a cute classroom wreath for your child's teacher for Christmas or Teacher Appreciation week (in May), here is the tutorial to make one just like the Hobby Lobby one!

Here are the supplies all from Hobby Lobby (except crayons):
-2 scrapbook pages - 1 with the alphabet and one light yellow
-Wide red ribbon
-3 wooden letters: an m, r, and s
-A bag of alphabet letters
-3 bags of miniature, colored clothes pins
-a bag of small, flat pieces of wood
-6 boxes of Crayola Crayons (got them for $0.50 at the beginning of the school year)
-1 10" embroidery hoop and 1 12" embroidery hoop (these came from my mama so they were free)

Step 1: Place your embroidery hoops inside one another on a flat surface

Step 2: Hot glue crayons to both embroidery hoops all the way around, leaving a small gap between each one.

Step 3: After all crayons are glued on the first layer, go through and add a second layer to hide gaps between each crayon. Do this all the way around the wreath.

Step 4: With all clothespins facing one direction, glue them around the perimeter of the wreath.

Step 5: Glue another row of clothespins next to the first row of clothespins going in the opposite direction (no picture - sorry!)

Step 6: Create the ribbon for the top of your wreath by cutting strips of your alphabet paper around the tops and bottoms of the letters.  You want these strips to be slightly narrower than the width of your red ribbon.  Take spray adhesive (I used Elmer's) and glue the alphabet strips to your red ribbon.  Then, using the layered strips you just glued together, cut strips out of your yellow paper wider than the ribbon.  Use spray adhesive to glue all layers together. You will make 2 strips, the width of your alphabet and yellow paper.

 
Step 7: Form your bow.  Take one of your strips and create a flattened circle out of it (lightly fold both sides down so that they overlap in the back) and hold it against the 2nd strip you made.  Wrap a piece of red ribbon around it.  Using a staple gun (and a pad of paper underneath it), staple your bow together in the middle.  Glue your letter block to the middle (I chose "K" for my first name).

Step 8: Paint your wood.  I wanted to make my little wood plaque look like a chalkboard. Using painter's tape, I made an edge to my board by painting the inside black and the outside red.  After it all dried, I wrote with a metallic Sharpie my last name on the chalkboard.  I painted my letters that spelled out "mrs." a pale yellow and put red, green and blue polka dots on them using the tip of my paintbrush.  Then, I glued the "mrs" to the top of my chalkboard.  Lastly, I assembled everything onto my wreath.  I took floral wire and wrapped it around the top of my embroidery hoop in the back to use as a hook and hung it on the inside of my classroom door.


I hope this tutorial helps and that you're able to use it to make the day of a teacher!  Let me know if you have any questions or if you make one yourself.  I'd love to see it!