
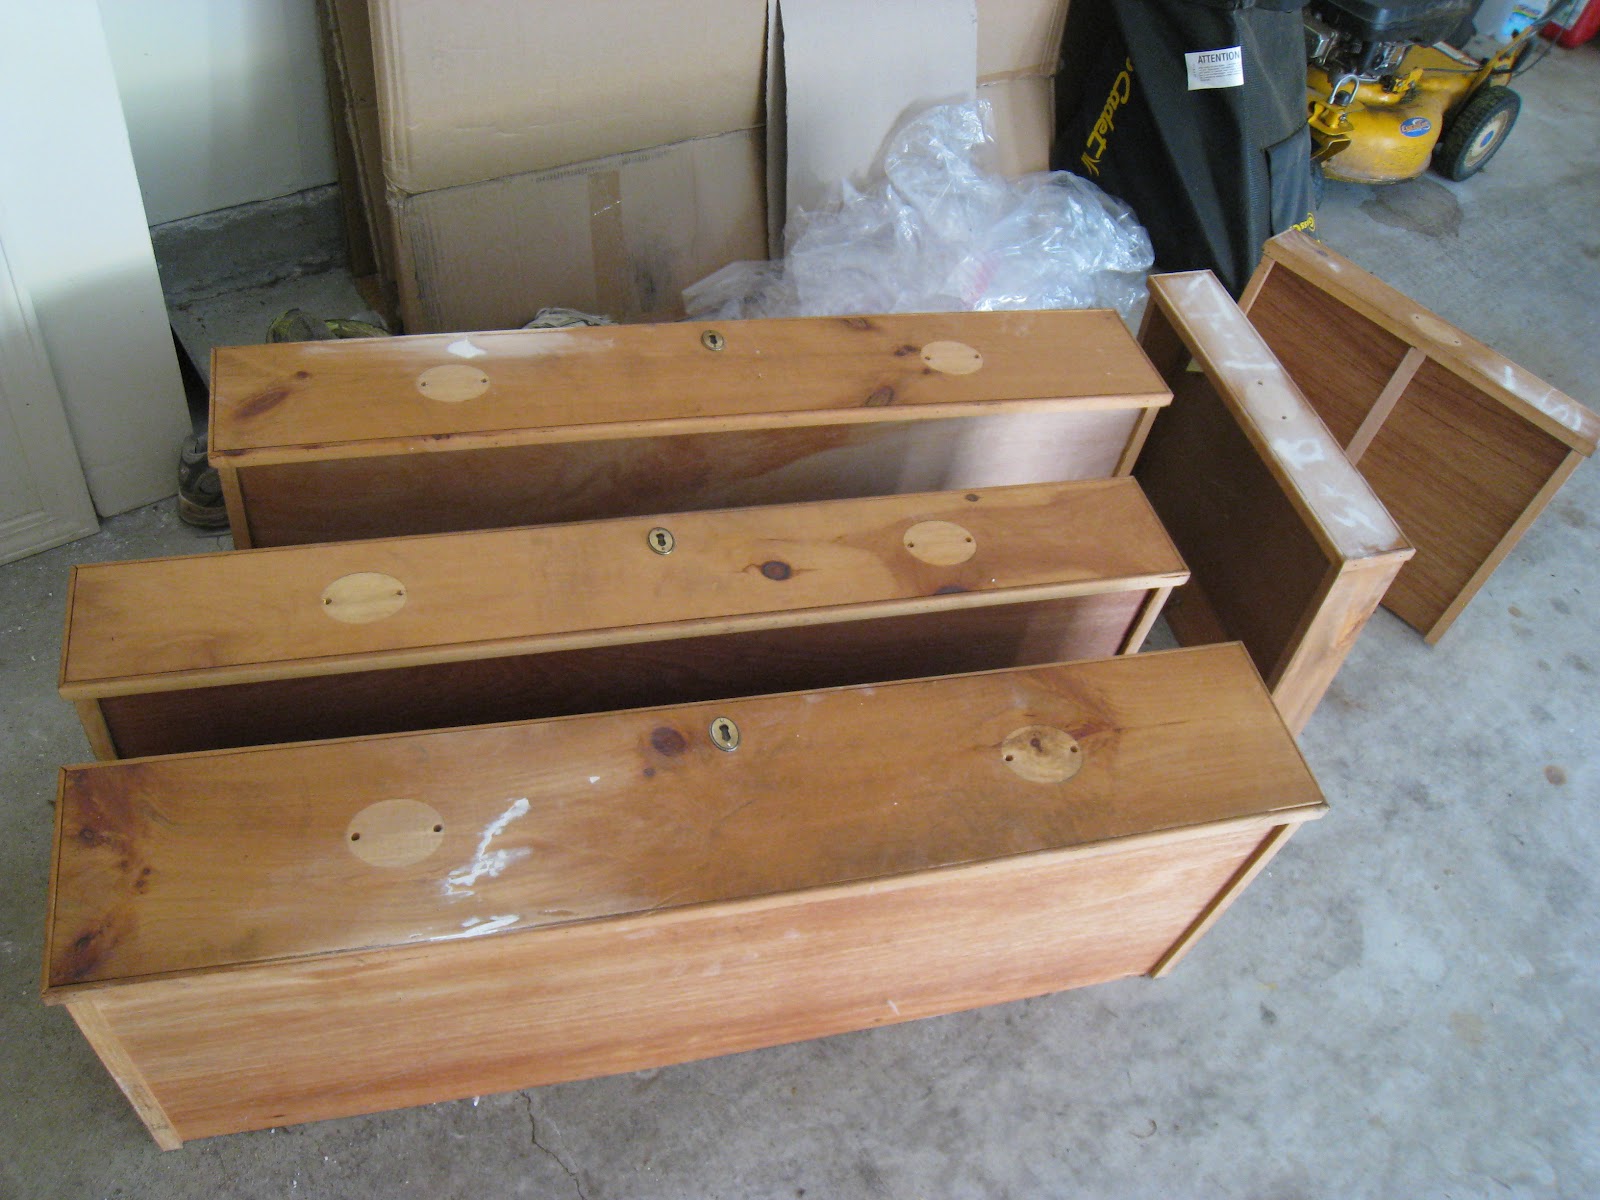
In March, 2011 I was in our apartment getting ready for our trip to Salt Lake City to visit friends and go skiing. Our apartment overlooked the side of a high rise building and I could see down into the area that was used for the dumpsters. Next to these dumpsters, a certain piece of furniture caught my eye...


{censored!} Make sure you're 18 or older!!!
Despite Stephen's disbelief, this did not stop me from wanting this dresser to be mine. My sweet husband went outside in the snow (it's March in Chicago) and carried this sucker down to the dungeon basement of our apartment building. There it sat until the end of July when we were packing up our moving truck to head back to our Old Kentucky Home. Our truck was literally filled to the brim and I almost lost this wonderful possession. In fact, Stephen contemplated (I could see it in his face) trying to convince me to accept my loss and leave Debbie the Dresser in Chicago. That moment only lasted a couple of seconds as I know he could read the longing on my face!
Fast forward to April, 2012 months after we have moved back to Louisville and Debbie (the Dresser) has been hanging out in our garage yearning for attention. It was my Spring Break and I knew I needed to make room in the garage (my parent's old dining room furniture is also hanging out in there - even as I type...I haven't gotten around to tackling that monstrosity!). So, if you ever come across your own slutty dresser that has lived a topless life and needs a face lift, here are the steps I followed:
1. Measured the opening in the top that was missing a wood piece. Went to Home Depot and picked out a thick piece of wood and had them cut it to size ($18). Used Elmer's Wood Glue ($6 - big bottle) to glue it into place and then used finishing nails (had them in my little kitchen nail kit from Target) to hammer it in around the perimeter.

2. After attaching the new top piece, there was still some gaps around the existing trim and the new top. I applied a liberal amount of wood putty ($8) to fill in the gaps.


3. I impatiently waited for this wood putty to dry and then I used sandpaper that I already had to sand down the wood putty I had put into the gaps.

4. I also used the same tub of wood putty to put on the drawers to fill in any scratches that I knew would be evident when I painted. I also waited for this putty to dry and then sanded it down smooth. (Before I did this, I removed the pulls)
5. My friend Jen told me about this blog where the blogger repainted her credenza. I literally did exactly what she did, only I used a different color. I went out and bought this Zinsser primer ($17) and I brushed it on, doing about 2 coats.


6. While I was waiting for the primer to dry, I pulled out some Krylon ORB spray paint that I already had on hand for this lamp project and I used it to spray paint the pulls for Debbie.


7. I used Rustoleum's High Performance Spray Enamel in White ($6 per can, I used 2 cans) to spray roughly 3 coats of white onto freshly primed Debbie.

8. I used a paint brush and sprayed the ORB spray paint onto a paper plate and then dabbed my brush into it to paint the keyholes without getting any ORB paint on my freshly painted drawer.

9. I did a thorough cleaning of the inside of Debbie (don't forget, she was a dirty dresser - that topless thang!) and then reattached my pulls. I had my studly hubby (and a friend) carry face lifted Debbie up to her new home in our guest bedroom.


The Price Breakdown:
-Dresser - free!
-Wood piece for top - $18
-Wood Glue - $6
-Wood putty - $8
-Primer - $17 (I bought a quart with lots left over)
-Spray Paint - $6/can, I bought 2 so $12
-Sand paper - had it so free!
-ORB spray paint - had it so free!
Grand Total: $61!
Talk about a CHEAP piece of furniture!
What a transformation!!!
With a little elbow grease and paint!
Here is Debbie the Dresser enjoying her new life in the guest room:


What about you? Have you found any treasures that someone else has put out for trash??? Tell me about your adventures!
I'm linking up with:
Fingerprints on the Fridge; TidyMom; Shabbynest; It's a HodgePodge Life; Finding Fabulous; Chic on a Shoestring Decorating; Simply Designing; My Romantic Home; Happy-Go-Lucky; Craftionary; Addicted2Decorating; Young and Crafty; Your Thriving Family; Tatertots and Jello; A Vision to Remember; Lolly Jane; Positively Splendid; Sundae Scoop; Making the World Cuter; Homemaker on a Dime; Sumo's Sweet Stuff; Sew Chatty; Craft-O-Maniac; CRAFT; DIY Project Parade; Etcetorize; Create With Joy; Polly Want A Crafter; Boogie Board Cottage; Between Naps on the Porch; Keeping It Simple; Mad In Crafts; Sew Can Do;


What a wonderful find! You did an awesome makeover! You never know what you will find that some else sees as trash!
ReplyDeleteDebbie is a knockout. You did a fabulous job. I need to find me a Debbie for my bedroom. What a find!
ReplyDeleteFound your link via Simply Designing's party. So glad I did. I'll be following along for sure.
Have a great weekend!
Love it!
ReplyDeleteWow, you did a great job!
ReplyDeleteI'd love for you to link this post to my Finished Friday Blog Party.
She looks FABULOUS! Well done, friend!!
ReplyDeleteDebbie is beautiful. Great job.
ReplyDeleteWow, Kari! You gave this dresser a beautiful makeover! You should be proud. Thanks so much for stopping by my blog. I appreciate your sweet comments.
ReplyDeletePS. Your email shows as a no reply blogger. Which basically means if you leave a comment I can not respond to you through email. To change this, go to your blogger dashboard, click "edit user profile", then check "show my email address" and save!
You did such a great job! I just found a sofa table on the side of the road that I plan to redo and turn it into a desk! Thanks for sharing! Just started following!
ReplyDeletedebbie is looking lovely
ReplyDeleteOh my goodness Kari!! I have wanted to do this to a piece of "trash" myself but I they just don't come my way! Maybe I need to move to Chicago :)
ReplyDeleteVery nicely done!
ReplyDeleteBEAUTIFUL!!!!! Congrats on your tranformation....
ReplyDeleteBlessings My Friend,
Very impressive makeover. I think I would have been intimidated by having to replace the top, but the price was certainly right!
ReplyDeleteSharon @ mrs. hines class
Great job on Debbie. My best curbside find was several hundred dollars worth of little boy like new toys, a new gorgeous lamp, and a box of hardly worn designer jeans (all just down the street). I have also found good rugs, a wicker table that needed just a little love - all curbside in Edmond, OK.
ReplyDeleteWhat a great find and save! I don't think I'll ever understand why people throw out perfectly good furniture. So glad you linked up at Etcetorize this week~
ReplyDelete