Supplies Needed:
*Roll of Contact Paper - $8
*Foam Paint Brush - $.99/bag
*Etch Cream - $8.50/3 oz bottle
*Thin Tip Sharpie - $2
*Exact-O Knife - $4
*A print off of what you want to etch - Free (assuming you have a computer and printer at home)
*Something to Etch - (Mine was a picture frame from the Salvation Army - $1.50)
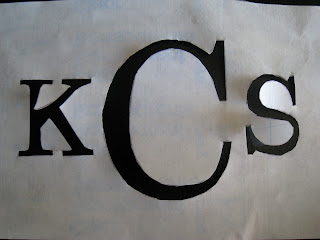
Step 1 - Trace your design onto your contact paper...make sure you have your paper facing the correct way and don't be like me who traced it and then spent time cutting the entire design out only to realize that it was backwards...doi!
Step 2 - Use your Exact-O Knife to cut out your design
Step 3: Wash and dry your glass surface to prepare it.
Step 4: Peel off the backing to the contact paper and carefully adhere it to your glass surface. Be sure you work out any seams or bumps in it that could allow the cream to seep under.
Step 5: Generously apply the etch cream to your glass in an up and down motion until the entire design has been filled in.
Step 6: Wait 5-10 minutes for the cream to attack the glass.
Step 7: Run your glass under the faucet until all traces of the cream have been rinsed off.
Step 8: Dry off your surface and peel off your contact paper.
Step 9: Admire your work :)
I added some scrapbook paper to my frame to make the monogram pop - obviously, you would skip this step if you were etching a vase.
Go get your hands on some etching cream and a glass piece you want to personalize! You can do this, it's super easy! :)
I've linked up to:
Sew Can Do; Tools are for Women; Between Naps on the Porch; Simpsonized Crafts; Southern Hospitality; Keeping it Simple; It's So Very Cheri; Sumo's Sweet Stuff; DIY Showoff; The Girl Creative; Making the World Cuter; Mad in Crafts; C.R.A.F.T.; Lucky Star Lane; Sugar Bee; Coastal Charm; All Thingz Related; Silly Little Sparrow; Hope Studios; Today's Creative Blog; Night Owl Crafting; Life in the Pitts; Bargain Shopping Paradise; Dragonfly Designs; Tea Rose Home; Someday Crafts ; Blue Cricket Design; Trendy Treehouse; Me and My Bucket; Sew Much Ado; Somewhat Simple; Fireflies and Jellybeans; The Shabby Chic Cottage; House of Hepworths; Everything Etsy; Life as Lori; Fingerprints on the Fridge; Shabby Nest; It's a Hodgepodge Life; No. 504 Main; Fun to Craft; A Few of My Favorite Things; Home Is Where My Story Begins; Tidy Mom; Chic On A Shoe String Decorating


Oh! The final product looks awesome, Kare Bear. :) Can't wait to see it in person.
ReplyDeleteThat turned out just wonderful! Great tutorial too! I've been wanting to try this...I've been to nervous though. I might just have to try your instructions. :)
ReplyDeleteCute!
ReplyDeleteYou added this to my scrapbook link party, so you want people to see it, add it to my motivate me monday party.
Kaysi
Keeping It Simple
I really like this and have always been intimidated by the warnings too! Great job, the hubbies have no idea what fun they're missing out on ;)
ReplyDeleteI recently started Etching but this is great I see a wedding present in my near future thanks!
ReplyDeleteOoh, I've been wanting to try this! I've been too nervous, though. Maybe I should just go for it.
ReplyDeleteThank you for participating in the Therapy Session with Life in the Pitts!
Oooooooo Pretty! Thanks for linking up!
ReplyDeleteThanks for joining us for another great Anything Related! ~Bridgette
ReplyDeleteLove etching cream!
ReplyDeleteThanks for linking up to Socialize with me Monday til Sunday!
hope to see you this week! :)
I've been afraid to try etching cream also. Your piece turned out great!
ReplyDeleteI’m having a new link party “Cheap Thrills Thursday” starting this Thursday the 29th. It’s for creative ideas that cost under $20. If you have a project you’d like to share, I’d love for you to stop by and join in!
Kat
www.BlackKatsDesign.blogspot.com
That is really pretty. Glass etching is one craft I have not tried...yet. You made it look not as scary as I thought. What a pretty outcome. Thanks for linking to tickled pink.
ReplyDeleteI love this. I have been wanting to etch all of my glass baking dishes so when you take them somewhere there is no mistaking who's dish it is.
ReplyDeleteCheri
This is going on my favs list.
ReplyDeleteCheri